Data download
NOT data server
Only principal investigators (PIs) have direct access to their data on the data server. The principal investigators can grant access to their data by generating and distributing a shared link. Details on how to do so can be found in the following instructions.
First of all, you need a user account to access your data. If you already have an account on our OB generator, you do not need to register a new one, your username and password are valid on both the OB Generator and the data server. Otherwise, please create an account here and note that it is essential to provide the same email address as indicated in the proposal submission in order to link your account to your data.
How to get my data?
How to share the data with my team?
How to get my data?
- Access to the NOT data server (https://data.not.iac.es/) and log in. In case you do not remember your username and/or password, contact with us at obsupport [at] not.iac.es
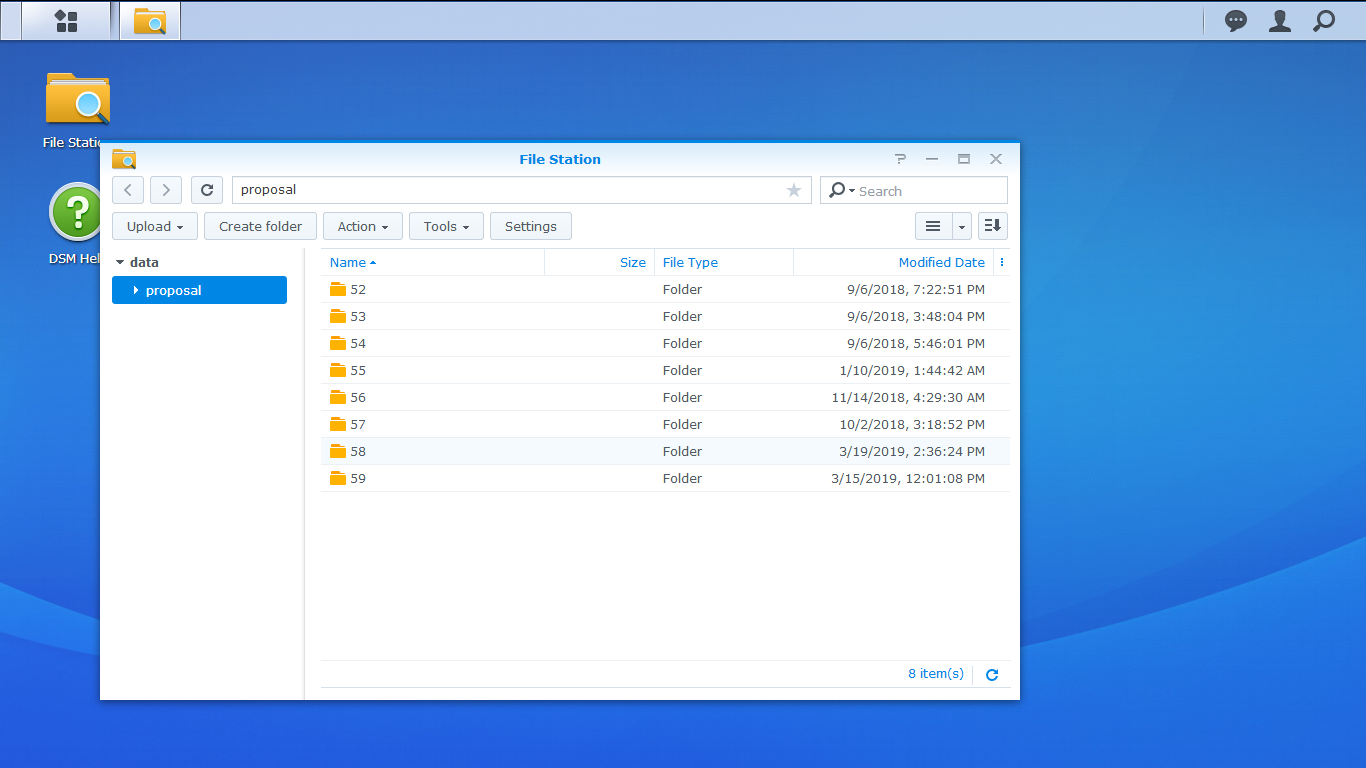
- Images on data server are sorted by period, proposal number, night and instrument. Those directories are under an unique shared folder named proposal that is indeed the home directory for all users, so after clicking on "File Station" icon a window will be opened from which you can navigate through the directory structure. Of course, you are only allowed to access the directories containing data related with your proposals (other proposal directories are not even shown).
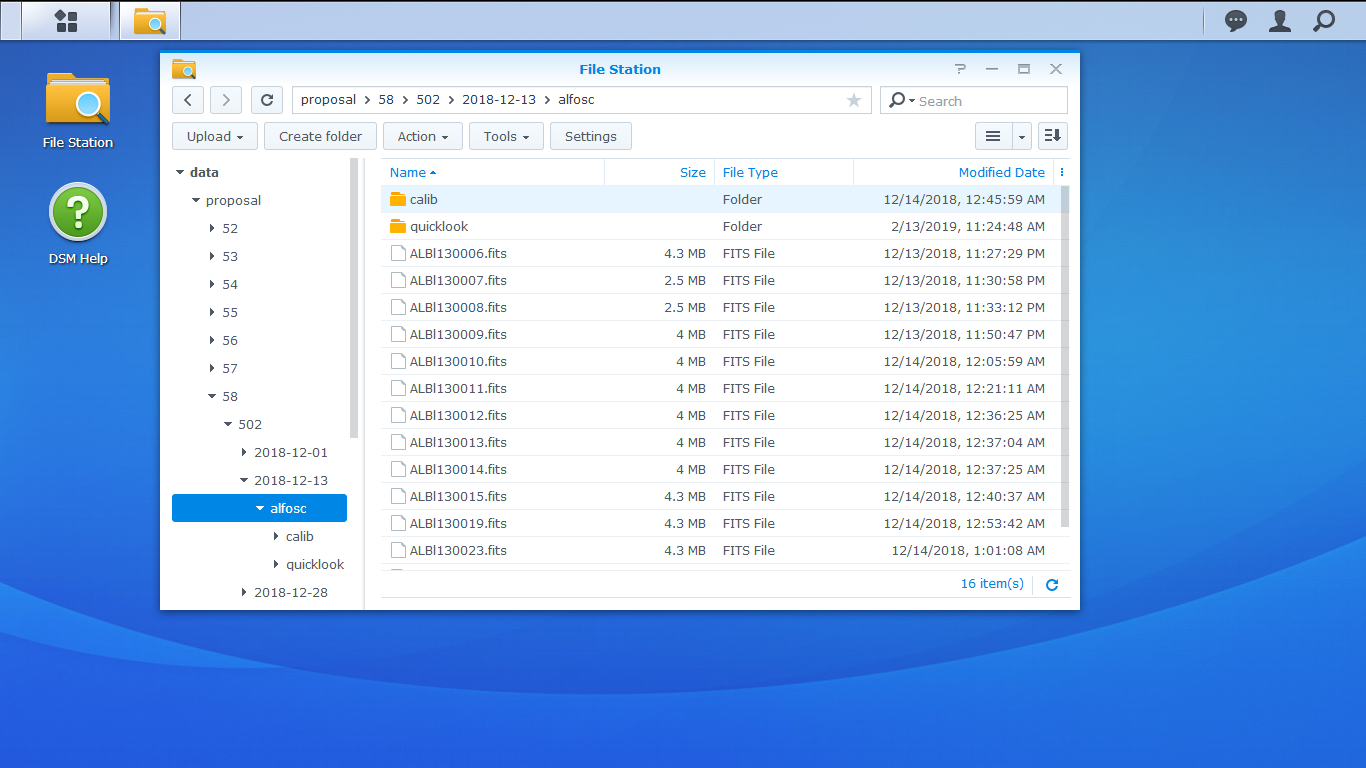
- Once the instrument directory root for a given night have been reached, you will find all raw files taken that night with said instrument and some of the following folders (if applicable):
calib - daily instrument calibration frames
quicklook - ALFOSC and NOTCam quicklook spectra
reduced - FIES spectra reduction files (Thorium-Argon, blaze correction, wavelenght and merge)
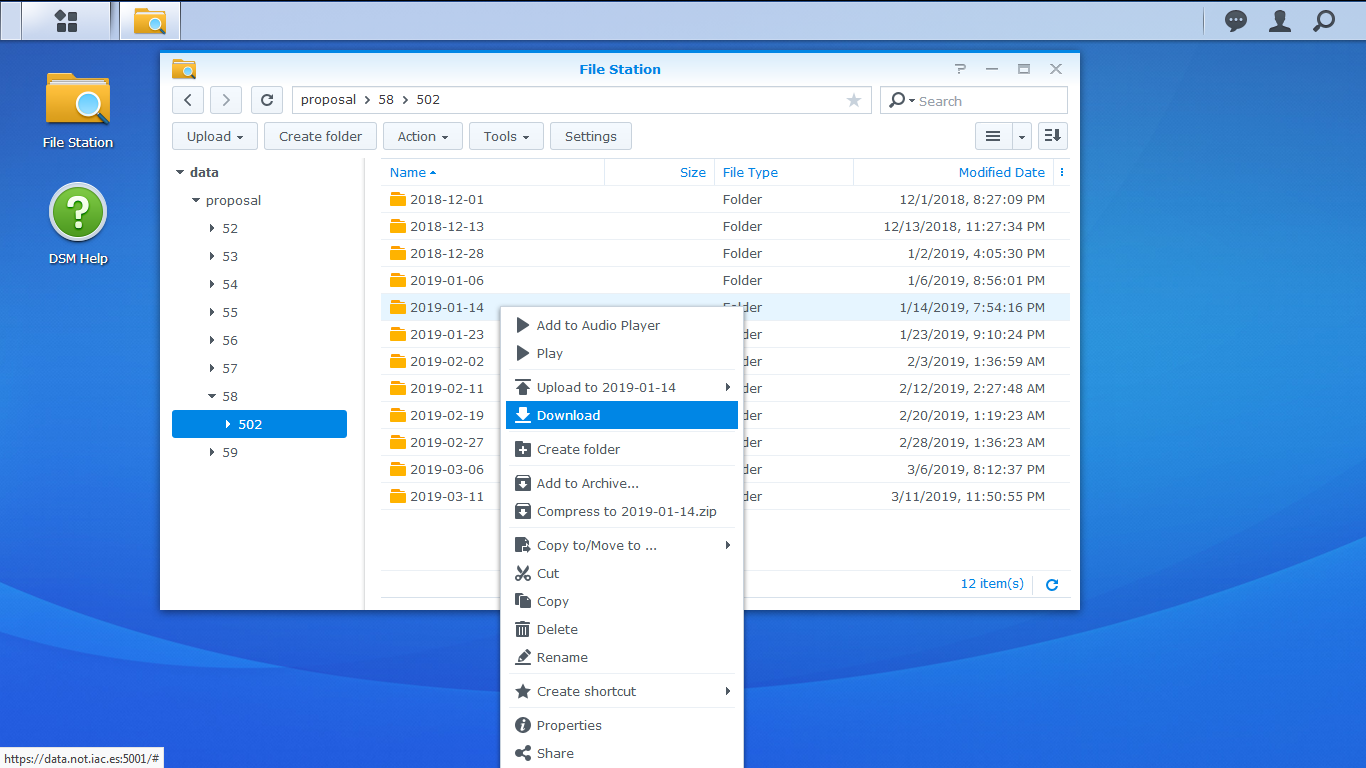
- You can download a single file by just double clicking on it or by choosing "Download" on the context menu (right clicking). This second way also leave you to select several files (by holding down the Shift key) or even entire folders, which are compressed before downloading. In fact, the most common use case is to download a ZIP file with all images taken in a night.
How to share the data with my team?
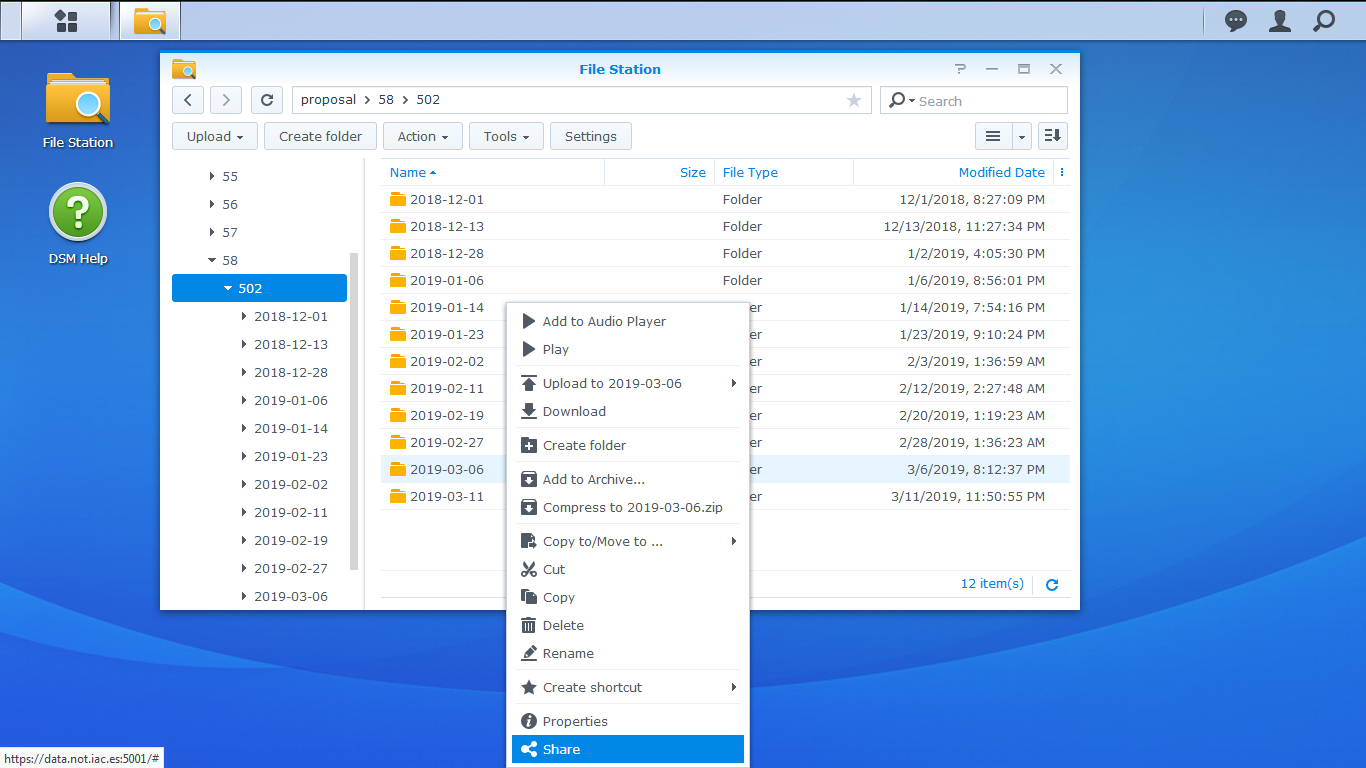
According to our data policy, only principal investigators have direct access to the server and therefore they have the responsibility to manage the access of a thrid person to their data. The graphic interface provides a tool for easily sharing a file or folder via HTTPS by following this steps:
- Right clicking on the item you want to share and choose the last option and a shared link will be generated for the file or folder you have chosen.
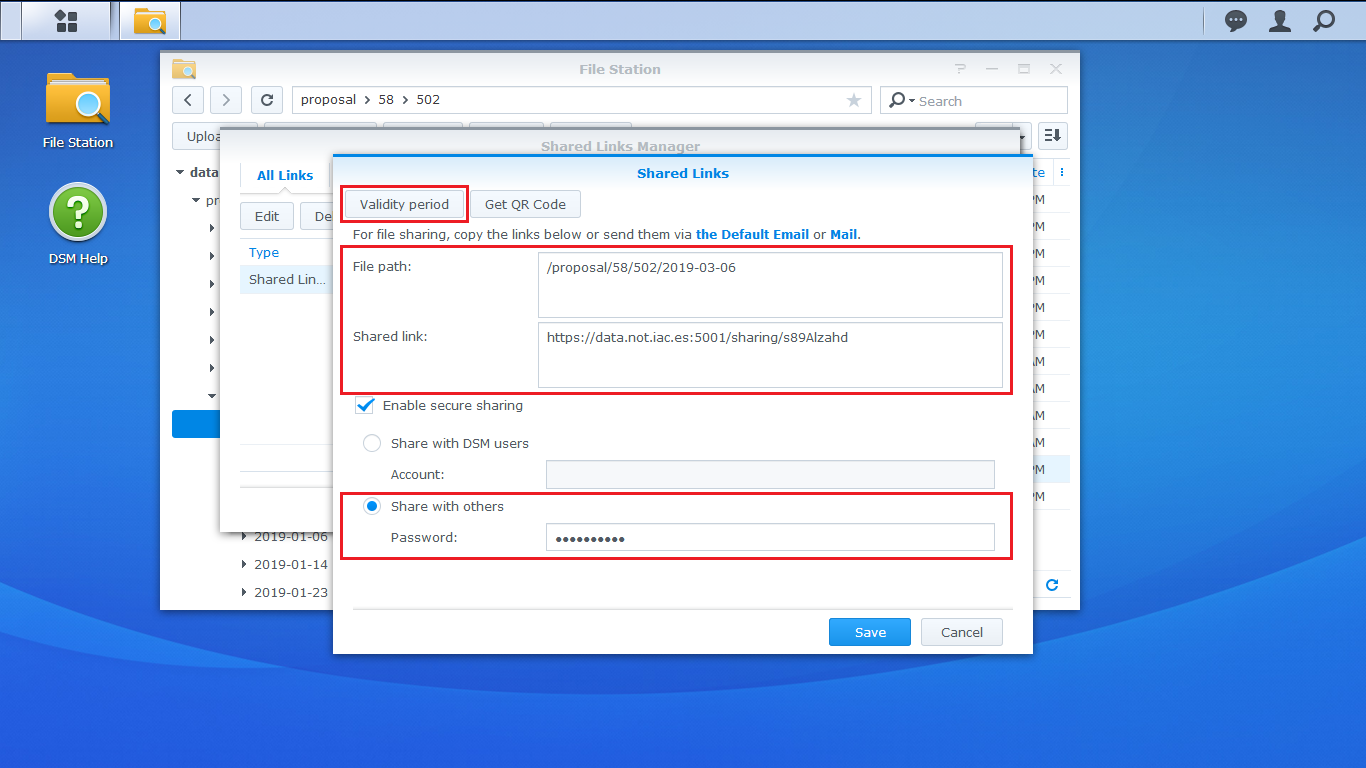
- On the next window you will see the shared link and you can set a validity period for it as well as an access password. Just click on "Validity period" button and set up the start or end date and time or the number of allowed access and/or tick the checkbox "Enable secure sharing", select "Share with others" and set the password you desire. Finally, click on "Save" button (the link will be automatically copied to your clipboard).
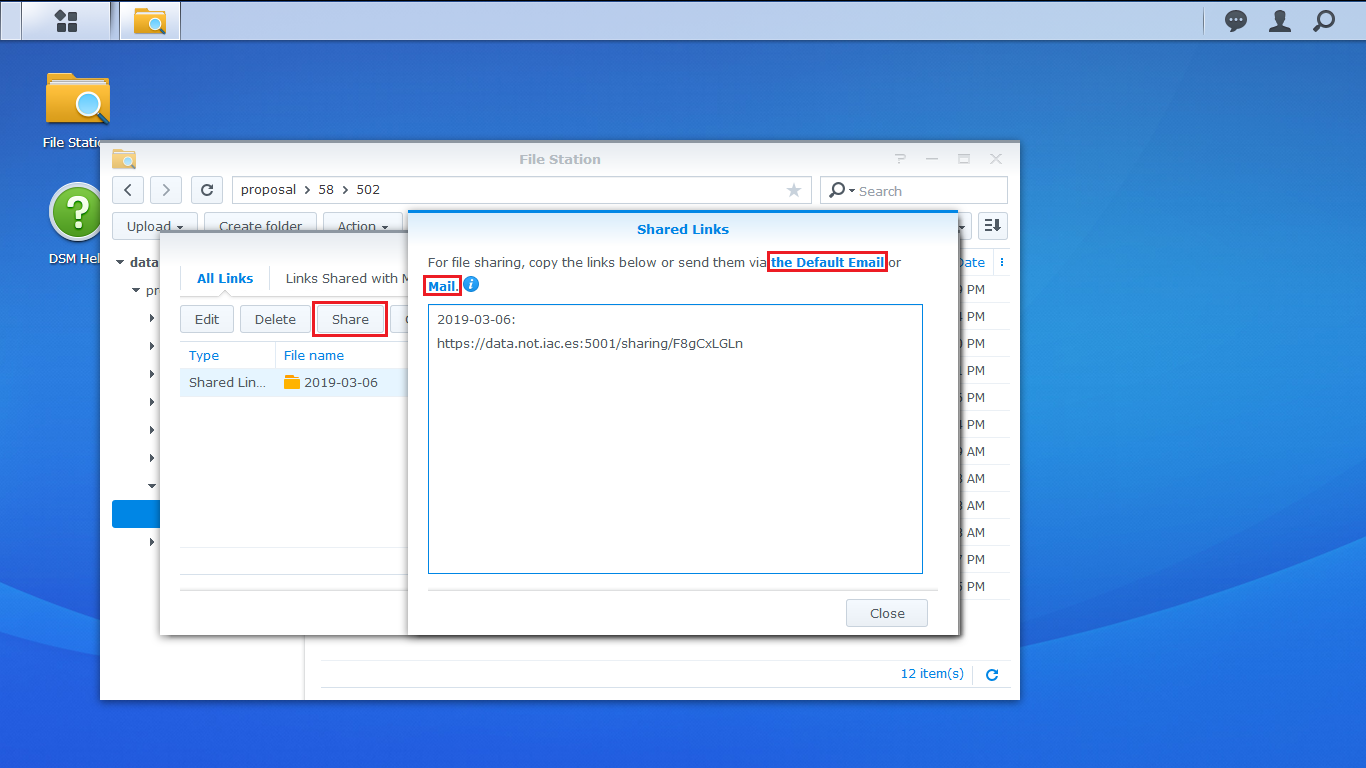
- Once the shared link has been created, click on Tools → Shared link manager to open a window with a list of all active links, select the link you want to share and click on "Share" button and a secondary window containing the link will appear. You can copy the link to your clipboard or send it by mail from the page itself.
|